No products in the cart.
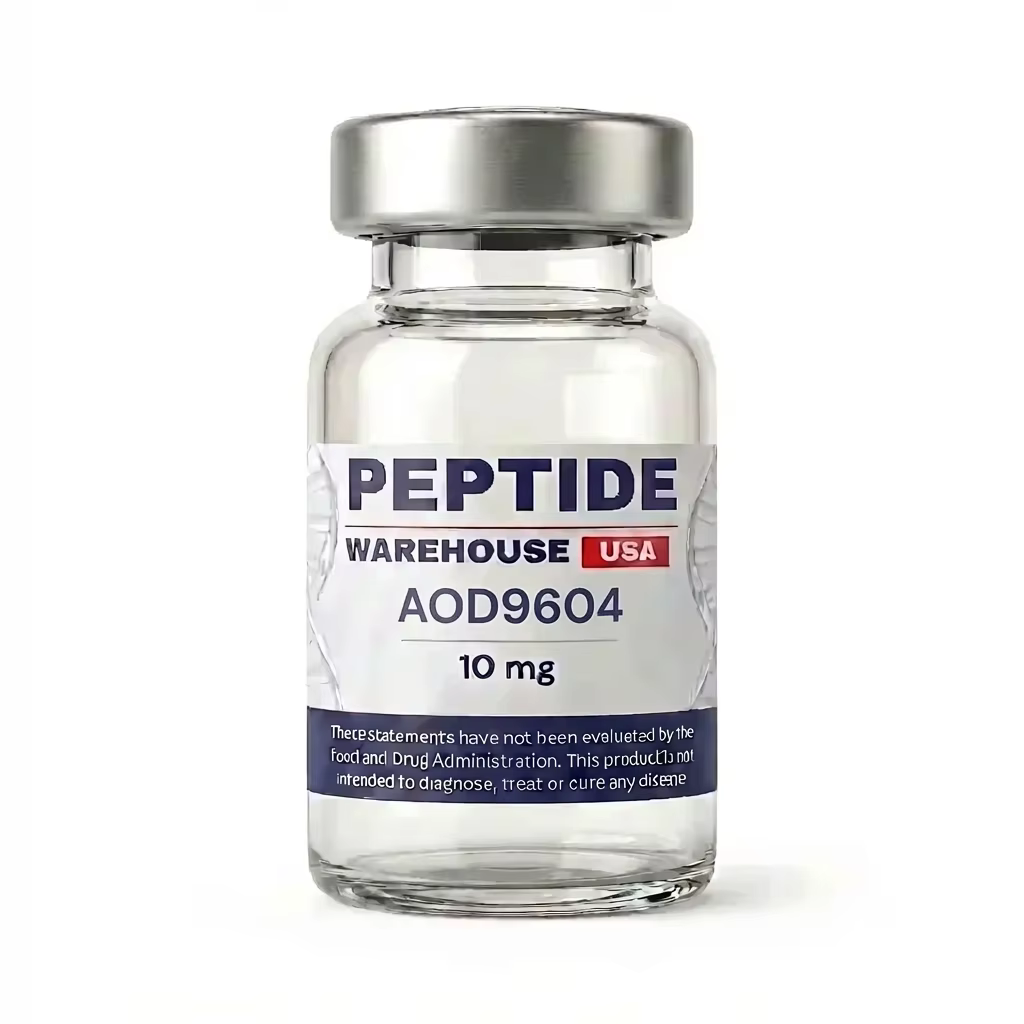
You’re probably here with a vial of lyophilized AOD 9604, bacteriostatic water on the bench, and one concern above all others. You don’t want to ruin the batch.
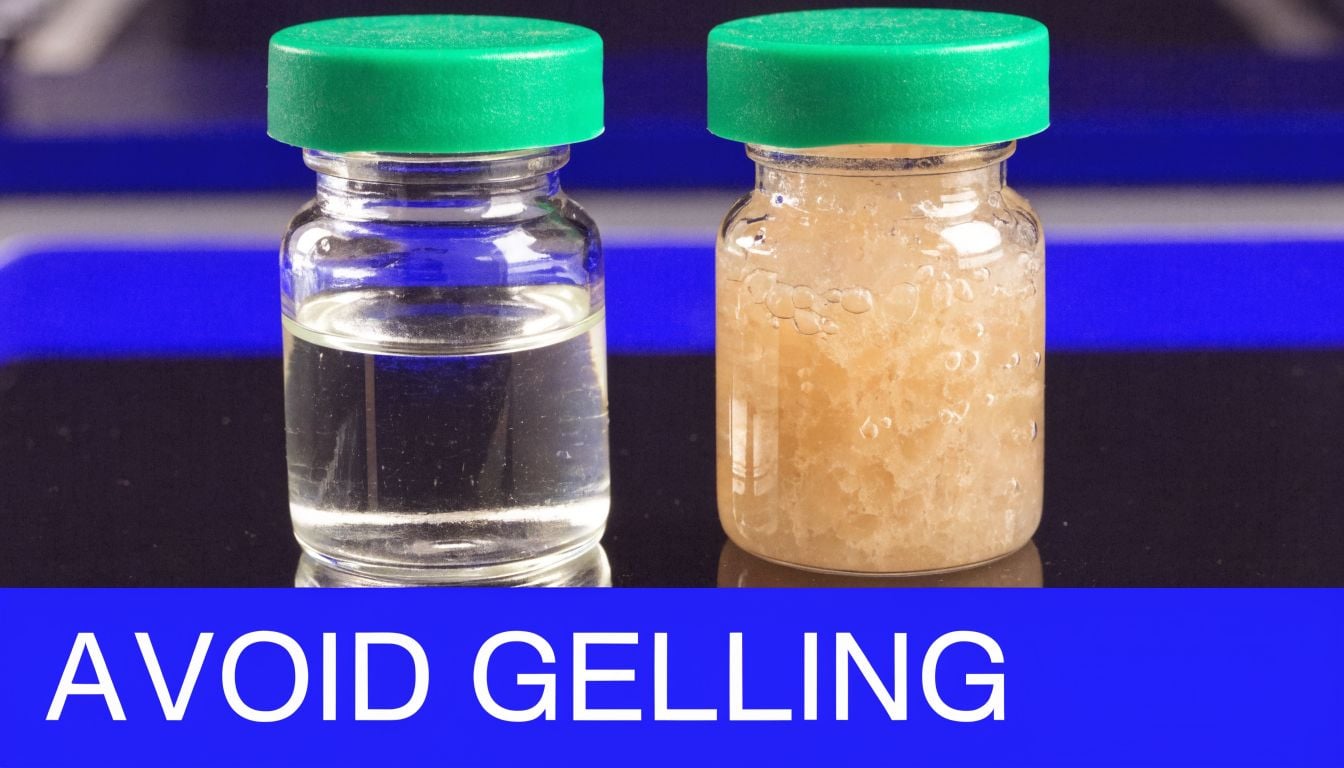
That concern is justified. Reconstituting AOD 9604 looks simple until the powder clumps, turns cloudy, or gels into something unusable. Most failures don’t come from bad intent. They come from rushed solvent addition, cold diluent, rough handling, or sloppy math.
This guide is built around the part that matters most in real lab handling. Getting a clear, stable solution without gelling, while keeping your process sterile and your dosing calculations consistent. If you’re new to reconstituting AOD 9604, treat this like bench protocol, not a casual prep task.
AOD 9604 usually gets wasted before the chemistry fails. A rushed setup, cold supplies, or the wrong syringe can turn a straightforward reconstitution into a cloudy, stubborn, gelled vial.
Set the bench correctly first. That decision protects sterility, keeps your measurements tight, and reduces the handling mistakes that trigger gelling.
Use a clean, dry surface with enough room to keep each item separated and visible. Crowding the bench leads to crossed hands, extra stopper contact, and preventable contamination. It also encourages rushed movements, which matter with AOD 9604 because rough handling increases the chance of poor dissolution.
Lay out every item in order of use before the vial is punctured. Keep the peptide vial upright, the diluent nearby, and your syringes capped until the moment you need them.
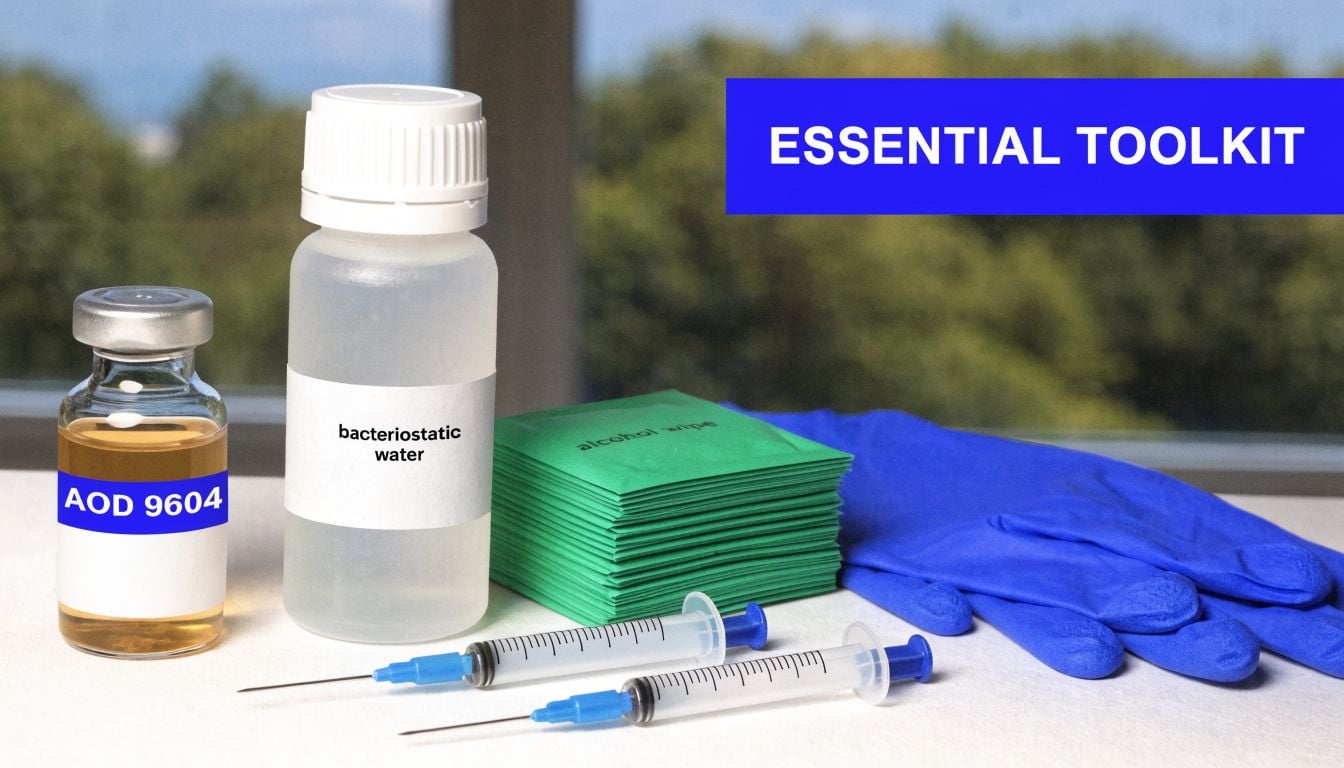
At minimum, prepare:
One missing tool can ruin the run. If you have to stop halfway to find a syringe or label, the vial stays exposed longer and the risk of contamination climbs.
AOD 9604 work is unforgiving at small volumes. Minor measuring errors shift concentration enough to create bad records, inconsistent draws, or unnecessary repeat work.
Choose a transfer syringe that gives you control, not speed. A syringe that is too large makes it harder to add diluent gently along the vial wall. A syringe that is too small may force multiple transfers, which means more punctures and more opportunities to introduce contamination or disturb the powder.
The insulin syringe matters for the same reason. Clear unit markings make repeatable withdrawals easier once the vial is fully reconstituted. Good visibility sounds basic, but poor readability is one of the fastest ways to drift off target during routine handling.
A practical setup usually includes:
Researchers new to peptide handling often focus on the vial and ignore the bench conditions around it. In practice, the environment usually causes the first mistake. Controlled setup, room-temperature materials, clean stoppers, and the right syringe combination give AOD 9604 the best chance to dissolve cleanly without turning into an avoidable gel.
AOD 9604 is often lost at the reconstitution stage, not because the materials were bad, but because the peptide was hydrated too fast, with cold diluent, or with too much force. Gelling usually starts there.
The goal is simple. Hydrate the lyophilized powder evenly, keep mechanical stress low, and give the peptide time to dissolve on its own.
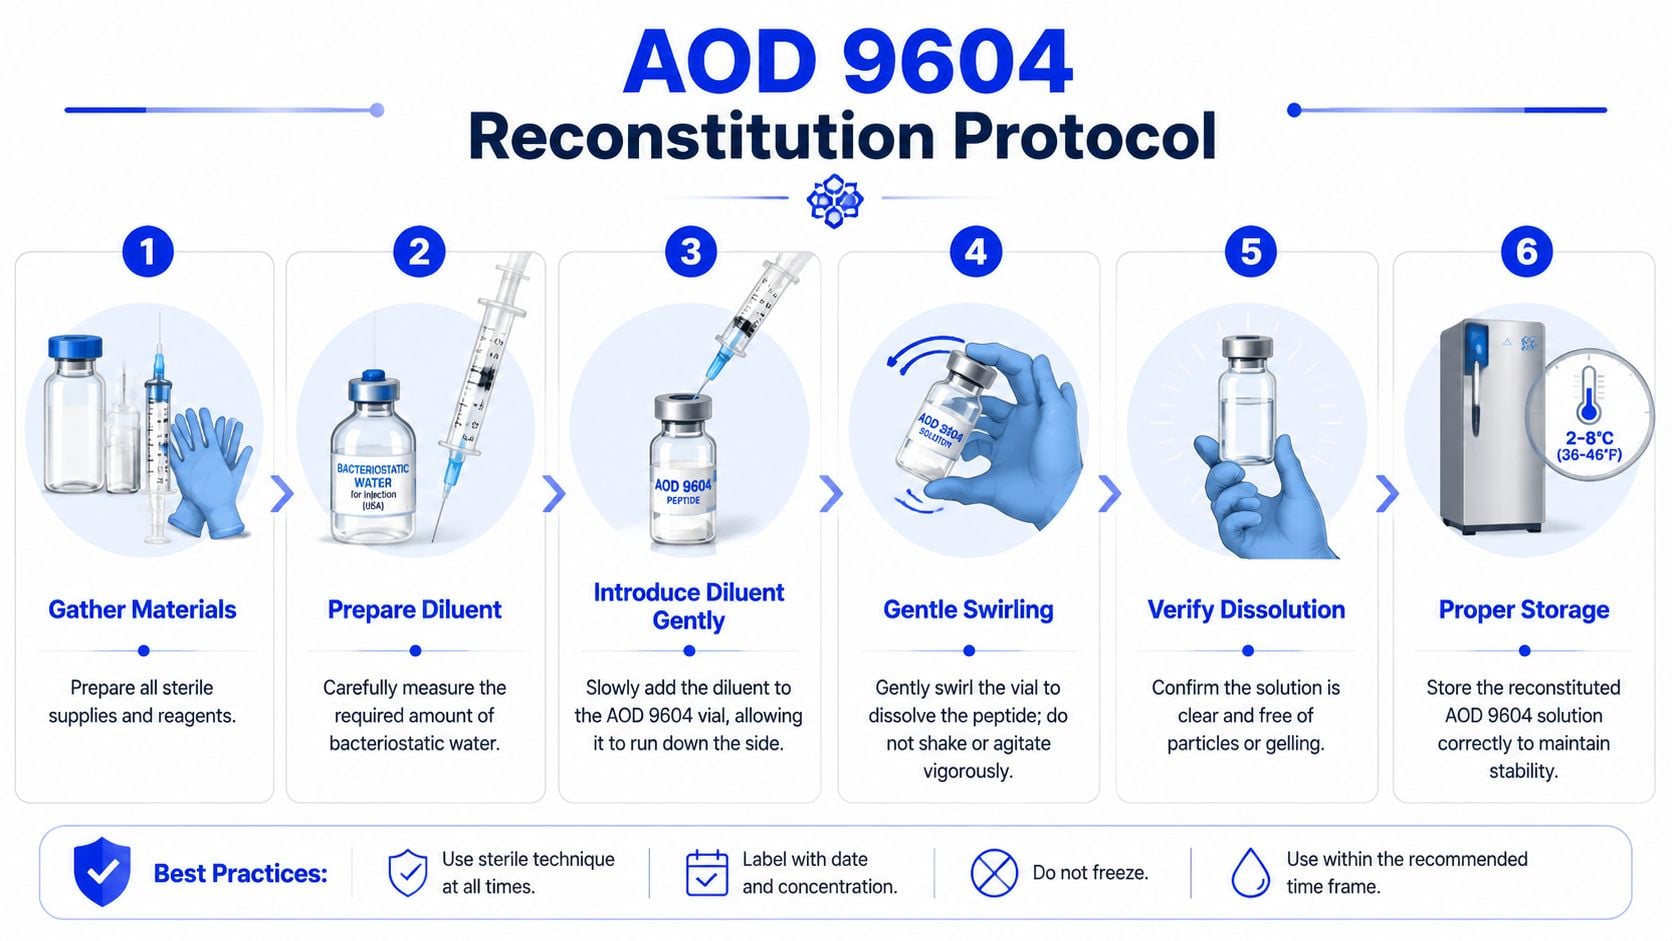
Place the peptide vial and bacteriostatic water on a clean bench before starting. If the diluent came from refrigeration, let it reach room temperature first. Cold bacteriostatic water increases the chance of poor dissolution and can push AOD 9604 toward a stringy or gelled appearance during hydration.
Swab both stoppers with alcohol and let them dry fully. Dry time matters. Puncturing a wet stopper can carry alcohol into the vial, and touching the stopper again defeats the cleaning step.
Check the vial before you begin. The lyophilized cake should look intact and dry. If it already looks collapsed, damp, or stuck heavily to the glass, use extra care during the first milliliters of diluent because that material can clump faster.
The first contact between water and peptide determines how the rest of the vial behaves. Fast injection creates turbulence. Turbulence traps bubbles, hits the powder directly, and raises the odds of clumping or gelling.
Use a steady hand and follow this sequence:
This is a technique step, not just a cleanliness step. AOD 9604 responds better to gentle hydration than to speed. In practice, slower addition takes only a little longer and prevents the much larger cost of a failed vial.
A quick visual reference can help if you want to compare your hand position and vial angle during setup:
If the diluent strikes the powder directly, the vial can turn cloudy, stringy, or gelatinous before the peptide has a fair chance to dissolve.
Once the full volume is in the vial, set the pace even lower. Shaking is a common mistake. It introduces foam, increases shear stress, and makes a borderline reconstitution worse.
Use gentle swirling or a light rolling motion between the fingers. Then wait. Some vials clear quickly. Others need several minutes of quiet rest before the last visible material dissolves.
Watch for these visual cues:
Do not keep mixing just because the vial is not instantly clear. Repeated agitation often makes the texture worse. In the lab, patience here saves more material than any rescue attempt later.
The vial is ready only when the solution looks uniform and free of visible undissolved material. Hold it up to the light and rotate it slowly. You are checking for clarity, consistency, and any strands clinging to the glass.
If the solution still looks uneven, let it rest again and return to gentle swirling only if needed. Force rarely fixes AOD 9604. Controlled hydration does.
A vial can reconstitute perfectly and still become a failed batch on paper. The usual mistake is simple. The researcher remembers the vial contains 5 mg, forgets the exact final volume, and draws by habit instead of by concentration.
For AOD 9604, that kind of shortcut creates two problems at once. Dose accuracy slips, and troubleshooting becomes harder if the vial later shows instability. When you are trying to prevent waste, every vial needs a clear concentration record from the start.
Convert the vial strength to micrograms, then divide by the final reconstitution volume.
For a 5 mg vial:
That gives you a working concentration you can use for every draw. No guessing. No mental math at the bench.
The two setups below are common because they balance precision differently:
| Total Diluent Added | Resulting Concentration | Volume for 300 mcg Dose |
|---|---|---|
| 2.0 ml | 2,500 mcg/ml | 0.12 ml |
| 3.0 ml | 1,667 mcg/ml | 0.18 ml |
The trade-off matters.
A 2.0 ml reconstitution gives a more concentrated vial, so each dose requires a smaller draw. That reduces injection volume, but it also makes small measuring errors more significant. A 3.0 ml reconstitution gives a less concentrated solution, which is often easier to measure consistently on a U-100 insulin syringe. The downside is a larger draw volume for the same dose.
In practice, researchers who struggle with tiny volume accuracy often do better with the more diluted setup. Researchers who need the smallest possible draw may prefer the stronger one. Neither is automatically better. The correct choice is the one your measuring tools and handling technique can reproduce reliably.
A U-100 insulin syringe measures 100 units per 1 ml. That means:
Now apply that to the reconstituted vial.
If the vial concentration is 2,500 mcg/ml, then:
If the vial concentration is 1,667 mcg/ml, then:
Write these conversions down once. Then label the vial and the study log the same way every time. That step prevents one of the most common bench errors: switching to a fresh vial and forgetting that it was reconstituted to a different final volume than the last one.
A simple three-step method keeps the math clean:
Convert mg to mcg
5 mg = 5,000 mcg
Divide by total volume
5,000 mcg ÷ 2.0 ml = 2,500 mcg/ml
Divide target dose by concentration
300 mcg ÷ 2,500 mcg/ml = 0.12 ml
That final number is the draw volume.
This matters more than it looks. Researchers often focus on the chemistry of reconstitution and treat the math like an administrative task. It is not. A concentration error can make a properly prepared vial functionally useless for the protocol.
Calculation habit: Label the vial immediately after reconstitution with the total volume, calculated concentration, and date. Do not trust memory once multiple vials are in cold storage.
One more practical point. If you change your reconstitution volume from vial to vial, document the reason. Consistency helps dosing accuracy, and it also helps isolate what caused a problem if one batch later behaves differently from another.
You add the diluent, the cake seems to wet, and within minutes the vial turns stringy or thick. At that point, recovery is unreliable, and the batch often has to be discarded. Gelling is the most common way AOD 9604 gets wasted during reconstitution, and it usually starts in the first few seconds of liquid contact.
AOD 9604 is sensitive at the hydration stage. The main problem is not the final volume by itself. The problem is how the first portion of diluent hits the peptide and how quickly the local environment changes inside the vial.
In practice, gelling usually traces back to three avoidable errors:
This is why two researchers can use the same vial, the same total volume, and get different results. Technique changes the outcome.
The best prevention is controlled hydration. Every step should reduce local stress inside the vial.
Start with room-temperature diluent. If bacteriostatic water has been refrigerated, let it sit until it is no longer cold to the touch. Then inject slowly with the needle bevel aimed at the inner glass wall, not directly into the peptide cake. The goal is to let the liquid run down the wall and spread gradually.
After the first portion is added, pause. Let the powder wet and settle before adding more. Once the full volume is in, use a gentle swirl only if needed. Do not shake the vial. Do not try to force clarity in seconds.
A practical bench rule helps here: if the vial still shows undissolved material, give it time before touching it again. Rushed handling causes more failures than slow dissolution.
A properly reconstituting vial usually moves from dry cake to partially wetted material, then to a clear solution. A problem vial often shows warning signs early. You may see stringiness, cloudy threads, thick patches near the bottom, or material that seems to clump where the first stream landed.
Stop and assess if that happens. More agitation rarely fixes the underlying issue. It usually makes the texture worse.
For that reason, the safest workflow is consistent and boring:
Some labs can reconstitute AOD 9604 with bacteriostatic water alone if technique is tight and temperature is controlled. Other labs run into repeat gelling with certain lots or under certain workflows. In those cases, a mixed-diluent protocol may be worth evaluating.
Acetic acid is sometimes used as part of that adjustment because changing the reconstitution environment can improve peptide solubility behavior. The trade-off is extra complexity. You now have another reagent, another measurement step, and less room for casual technique. If a lab adopts that approach, it should be standardized, documented, and repeated the same way every time.
If your current method gives a clear solution without repeated failures, keep it simple. If gelling keeps happening despite careful room-temperature handling, slow wall injection, and gentle mixing, then a revised solvent system is a reasonable troubleshooting step, as noted earlier.
The vial looked perfect when it was mixed. Two days later, the solution is cloudy, the stopper has been pierced half a dozen times, and nobody is sure how long it sat on the bench between draws. That is how good material gets lost after a technically correct reconstitution.
Post-reconstitution stability is mostly a handling problem. Once AOD 9604 is in solution, the goal is to limit the stresses that push a clean, usable preparation toward degradation, contamination, or a visible change that makes the sample questionable. Labs that struggle with gelling during reconstitution often make a second mistake here by exposing the vial to repeated temperature swings. A peptide that was difficult to dissolve should be handled even more carefully after mixing.
Store the reconstituted vial under refrigeration at a stable, cold temperature. Protect it from light. Keep it upright when possible, and do not freeze the solution unless your protocol specifically validates that approach.
Consistency matters more than people expect. A vial that warms up on the bench several times a day and then goes back into the refrigerator is under repeated stress. That does not guarantee failure, but it does increase the chance of appearance changes, concentration drift from handling loss, and avoidable questions about sample quality.
A practical storage routine looks like this:
If a study requires frequent access, aliquoting can be the cleaner option. That reduces how often the primary vial is pierced and helps limit the warm-cold cycling that can contribute to instability.
The stopper is the weak point after reconstitution. Every needle entry creates another chance to introduce contamination or compromise the closure.
Use the same routine every time. Swab the stopper with alcohol and let it dry fully before puncturing. Use a new sterile syringe and needle for each draw. Return the vial to cold storage without leaving it out while other tasks are finished.
Before withdrawing any solution, inspect the vial under good light. Look for cloudiness, stringiness, surface film, particles, or a change in how the liquid moves along the glass. Those are not details to dismiss, especially in a guide focused on preventing wasted peptide from solubility and handling failures. If the solution no longer matches its original appearance, quarantine it until the issue is reviewed.
Good records help here. Label the vial with the reconstitution date, diluent used, and final concentration.
AOD 9604 should be handled with the same seriousness you’d apply to any sensitive research compound. That means precise documentation, controlled storage, and clear separation between research use and anything outside that scope.
A sloppy reconstitution doesn’t just waste material. It undermines consistency across the entire protocol.
Safe practice usually comes down to a short list:
That standard protects the sample, the procedure, and the credibility of the result.
For researchers who want USA-made, high-purity compounds supported by COAs and batch documentation, Peptide Warehouse USA is worth exploring. Learn more about their research peptide catalog and sourcing standards if you’re building a more dependable lab supply workflow.