No products in the cart.

A new peptide vial looks simple until you have to turn that dry powder into a solution you can use. That’s the point where good research either stays clean and repeatable, or starts drifting because of avoidable math, measurement, or handling mistakes.
If you’re searching for a peptide reconstitution calculator online, you probably want two things at once. You want speed, and you want confidence that the number on the screen matches the reality in the vial. That’s the right instinct. A calculator is useful, but only when you understand what it’s calculating and where potential failure points are.
Most mistakes don’t happen because the formula is hard. They happen because someone mixes up units, chooses a volume without thinking through the resulting concentration, or treats the calculator like a black box. The better approach is simple: understand the concentration relationship, calculate deliberately, then use the tool as a verification step.
You open the package, check the vial, and see a small amount of lyophilized peptide at the bottom. It doesn’t look like much, but every decision from that point forward affects concentration, handling accuracy, and the reliability of the work that follows.
Reconstitution is where abstract numbers become a physical solution. Once liquid goes into the vial, you’ve defined the concentration that every later withdrawal depends on. If that setup is wrong, every downstream dose calculation is wrong too.
That’s why careful researchers don’t stop at “how much water do I add?” They ask better questions. What concentration am I trying to create? How easy will that concentration be to measure with the syringe or pipette I’m using? Is the calculator output consistent with the mass in the vial and the volume I plan to add?
A peptide reconstitution workflow should be boring in the best way. The math should be clear, the setup should be sterile, and the result should be easy to verify without guesswork.
Practical rule: If you can’t explain the concentration in plain language, you shouldn’t trust the draw volume yet.
That’s the standard to aim for. Not memorizing a shortcut. Not relying on someone else’s chart without context. Just understanding how mass, volume, and concentration relate so you can catch mistakes before they affect the experiment.
A good calculator helps. A good mental model prevents preventable errors.
Peptides are commonly supplied in a lyophilized form because dry material is easier to keep stable than the same compound already dissolved. Reconstitution is the step where you add a chosen diluent and create a working solution with a known concentration.
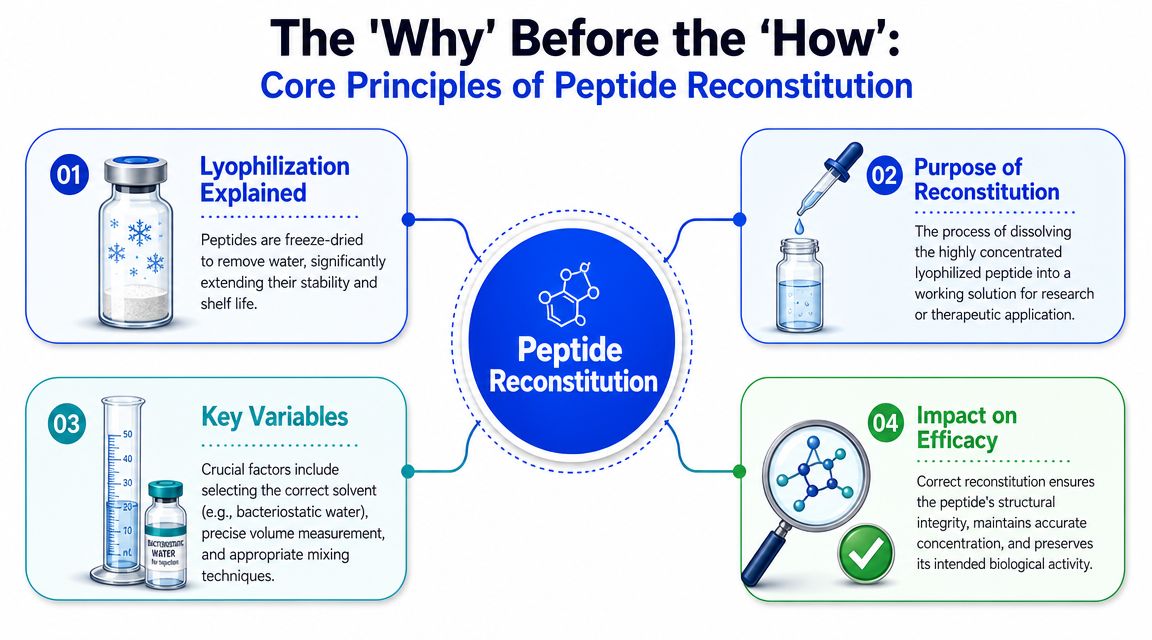
In practical lab terms, reconstitution is not “just adding water.” It’s defining the concentration of the final solution on purpose.
That matters because the peptide amount in the vial stays fixed. What changes is the amount of liquid you add, and that choice determines how concentrated the final solution becomes. More diluent gives you a lower concentration. Less diluent gives you a higher concentration.
Imagine dissolving a measured amount of solute into a selected volume. The powder amount is your fixed starting point. The liquid volume is your control lever.
Every reconstitution decision comes back to three variables:
You only need two of those to solve for the third. That’s why the math behind reconstitution calculators is so consistent across tools. The relationship is the same whether you enter the vial mass and target concentration, or the vial mass and the volume you plan to add.
The point of the math isn’t to satisfy the calculator. The point is to create a concentration that’s easy to prepare accurately and easy to measure consistently afterward.
This is also where researchers get into trouble when they choose a volume for convenience without checking what concentration that creates. A very concentrated solution can be valid mathematically, but awkward in practice if your intended aliquots become tiny and hard to measure cleanly.
A workable setup balances two goals:
| Decision factor | What you want |
|---|---|
| Concentration | Strong enough to keep draw volumes practical |
| Measurability | Dilute enough that small target amounts can still be measured reliably |
| Handling | A solution that dissolves cleanly and can be mixed gently |
| Verification | A setup you can explain and recalculate without ambiguity |
A calculator helps with the arithmetic. It does not choose a sensible workflow for you. That judgment still belongs to the person holding the vial.
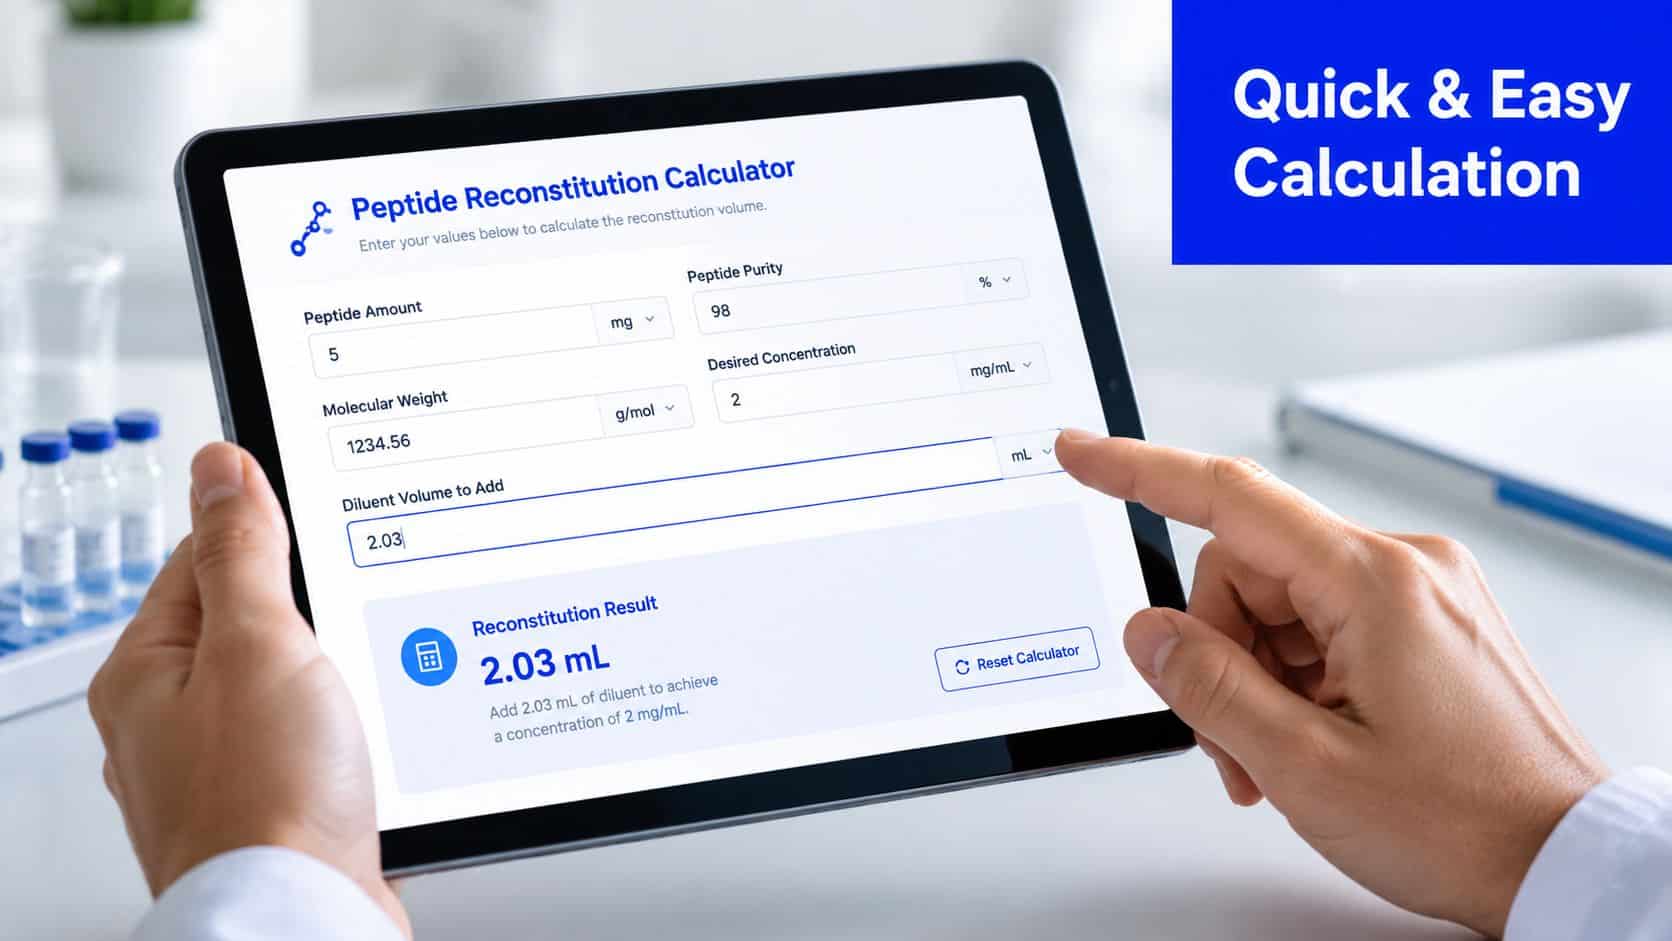
The core formula is straightforward: volume = mass ÷ desired concentration. That’s the same mass-concentration relationship used by online tools, and Peptide warehouse reconstitution calculator shows a concrete benchmark: entering 10 µg/mL as the desired concentration and 2 µg as the compound mass returns 0.2 mL (200 µL) of solvent.
There are really two forms worth remembering:
If you know how much peptide is in the vial and what concentration you want, you can solve for the reconstitution volume. If you already know the mass and the volume you added, you can solve for concentration.
That’s all the calculator is doing behind the scenes. It’s not using special peptide-specific logic. It’s applying a concentration equation cleanly and, ideally, normalizing the units before solving.
The benchmark above is useful because it strips the process down to the essentials.
| Input | Value |
|---|---|
| Mass | 2 µg |
| Desired concentration | 10 µg/mL |
| Calculated volume | 0.2 mL (200 µL) |
Why this matters in practice is simple. The calculator translates a fixed batch amount into an exact liquid volume you can pipette. That reduces the chance of manual arithmetic or conversion errors.
Most trouble starts with units, not the formula itself. A clean conversion habit prevents most of the confusion.
| Measurement | Conversion | Example |
|---|---|---|
| Milligram to microgram | 1 mg = 1000 mcg | 0.5 mg = 500 mcg |
| Microgram to milligram | 1000 mcg = 1 mg | 250 mcg = 0.25 mg |
| Milliliter to microliter | 1 mL = 1000 µL | 0.2 mL = 200 µL |
| U-100 syringe relationship | 1 mL corresponds to 100 units | 0.1 mL corresponds to 10 units |
If you mix mass units and volume units carelessly, the result can still look neat on paper while being wrong in the vial. That’s why I always recommend writing the units in every line of the calculation, even when the math feels obvious.
Bench habit: Cancel units as you go. If the units don’t reduce cleanly to mL or µL for volume, stop and fix the setup before you touch the vial.
One more point matters here. A calculator can produce a correct output from incorrect assumptions. If the mass entered is wrong, or the target concentration is not the one you need, the tool will still return a clean number. Manual understanding is what lets you catch that.
A peptide reconstitution calculator online is most useful when you treat it as a fast verification layer. It speeds up setup, helps with mcg-to-mL conversion, and often translates the result into syringe units so you can move from concentration math to actual handling more efficiently.
Near the start of your workflow, a visual layout helps keep the fields straight:
Most peptide calculators ask for some version of these inputs:
The output is usually presented as concentration, draw volume, and in some tools, corresponding syringe units. That’s useful because contemporary calculators often combine reconstitution volume, mcg-to-mL conversion, and U-100 syringe markings in one workflow, with some tools describing the result as how far you need to pull the syringe.
One example available to researchers is the Peptide Warehouse USA reconstitution calculator, which lets users select syringe size, peptide vial quantity, and bacteriostatic water volume to calculate post-reconstitution dosages.
The primary advantage is consistency. You don’t have to repeatedly convert between mg, mcg, mL, and units by hand when the tool can surface the same relationship instantly.
But this is also where people get overconfident. The math may be consistent across major tools, yet a setup mistake still carries through the output. One verified peptide calculator guide warns that if a vial should be prepared at 0.1 mg/mL but is accidentally prepared at 1 mg/mL, the final dose taken from that vial becomes 10 times too high.
That’s not a calculator problem. That’s an input and preparation problem.
A short video walkthrough can help if you want to see the field flow in action before using one yourself.
When using any calculator, I check four things before accepting the output:
If any of those fail, the number on the screen isn’t ready for the bench.
Good reconstitution is equal parts math and execution. The calculator can tell you what volume to add or withdraw. It can’t keep your technique sterile, your labeling clear, or your handling gentle.
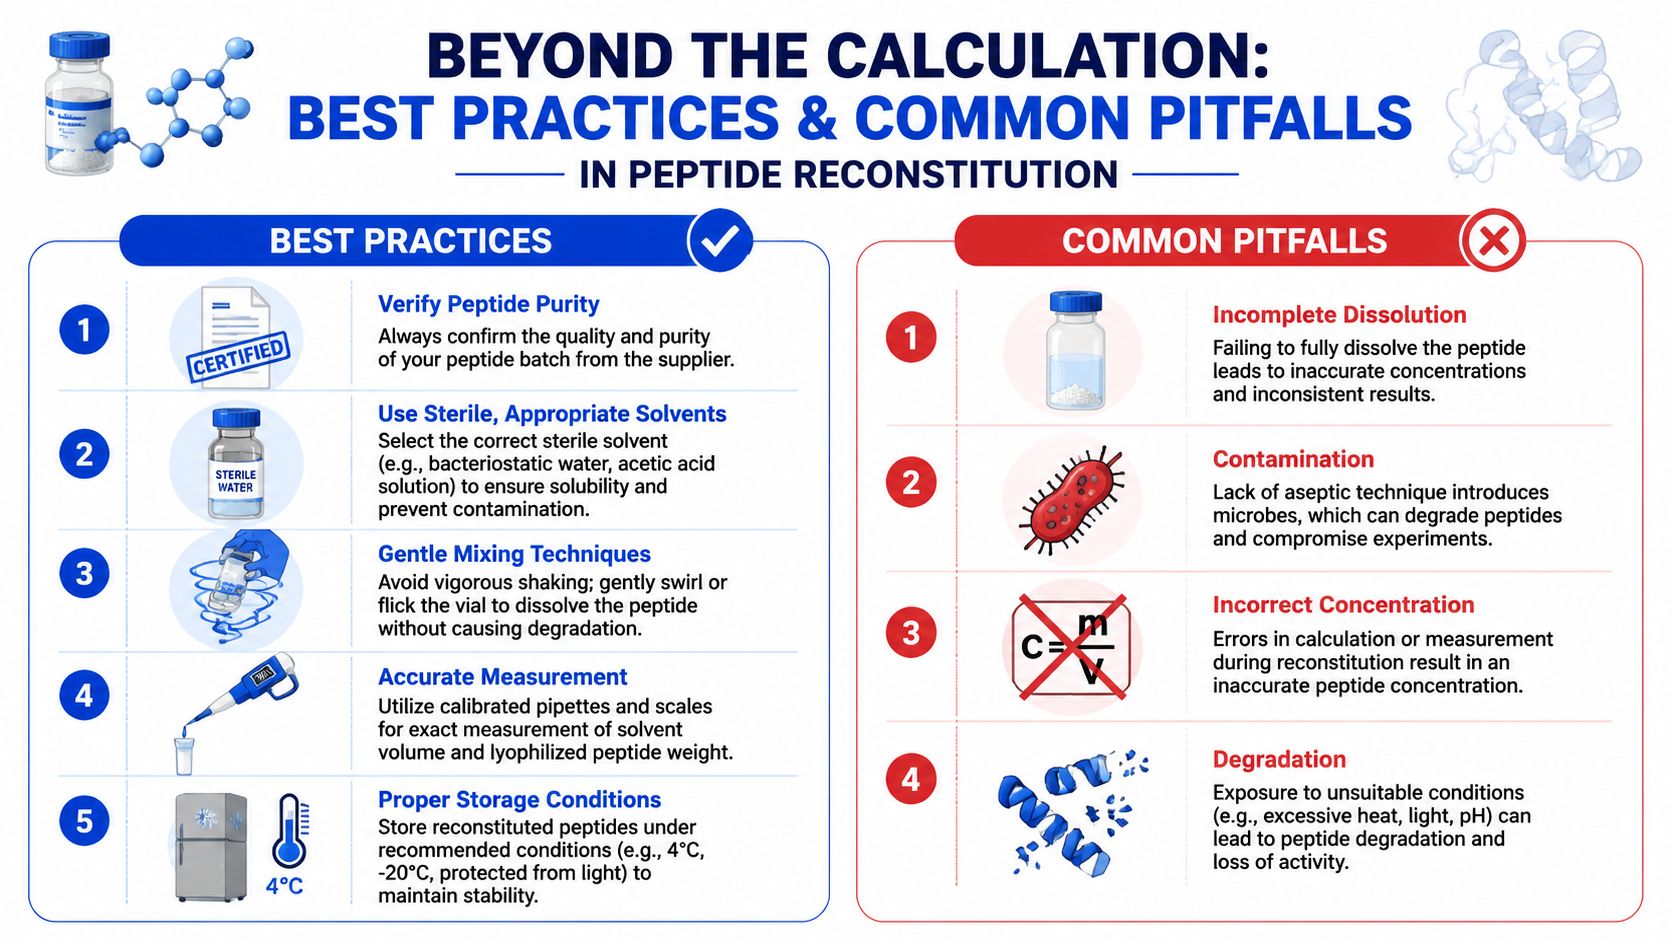
The diluent isn’t interchangeable just because it’s clear and sterile. Researchers commonly think in terms of bacteriostatic water versus sterile water, but the right choice depends on the intended handling pattern and the compound’s compatibility requirements.
What matters most is consistency and fit. Use the solvent appropriate for the peptide and the workflow, then document that choice so nobody has to infer it later from memory or assumption.
Contamination doesn’t announce itself. A solution can look fine and still be compromised by poor vial handling, repeated stopper punctures, or sloppy transfers.
The basic discipline is familiar but essential:
A clean calculation with poor technique still produces unreliable material.
A freshly reconstituted peptide should be treated like a defined lab preparation, not an informal mix you’ll “remember later.” Label the vial with the compound identity, concentration, diluent, and preparation date according to your lab’s system.
Storage also deserves more attention than it usually gets. Peptides are sensitive materials, and repeated warming, light exposure, or avoidable handling cycles can undermine consistency even when the original calculation was correct.
Calculators have adapted to practical workflow needs too. Contemporary tools often combine reconstitution volume, mcg-to-mL conversion, and U-100 syringe markings, with some showing results in both mL and “units” to improve repeatability across common syringe formats.
Some errors are obvious only after you’ve made them once. Better to catch them early.
Accurate peptide reconstitution starts long before you draw the first aliquot. It starts with understanding what concentration you need, why that concentration makes sense for your workflow, and how the mass in the vial translates into a measurable liquid volume.
That’s why the strongest approach isn’t manual math alone or calculator use alone. It’s both. Know the relationship between mass, volume, and concentration. Run the numbers yourself when needed. Then use a peptide reconstitution calculator online to confirm the setup and reduce avoidable arithmetic mistakes.
The deeper lesson is simple. Calculators are valuable because they remove friction, not because they remove responsibility. Reliable results still depend on good inputs, clean technique, sensible dilution choices, careful labeling, and disciplined storage.
If you keep those pieces together, reconstitution becomes routine in the right way. Clear. Repeatable. Easy to verify.
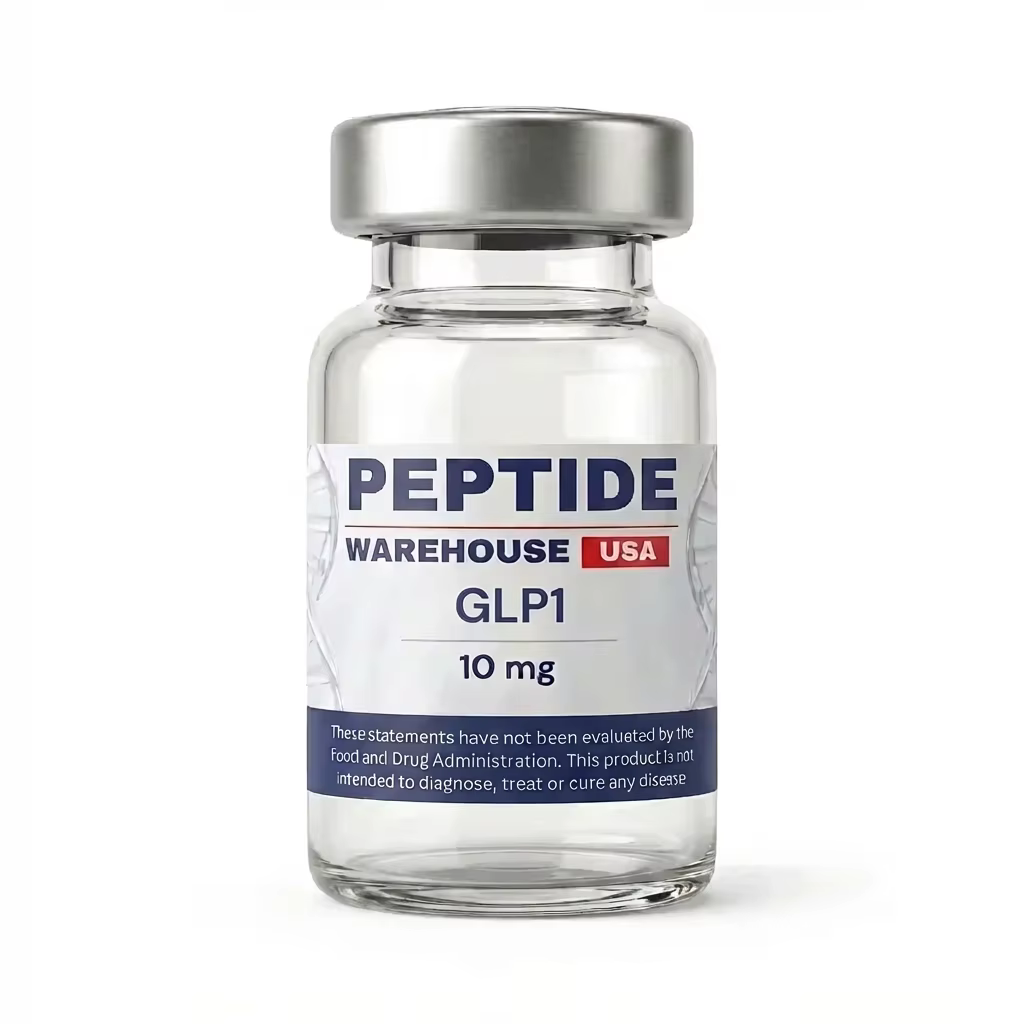
If you’re sourcing compounds and lab materials for upcoming work, explore Peptide Warehouse USA to learn more about its catalog of research peptides and related products for laboratory, analytical, and preclinical applications.
Leave a comment