
No products in the cart.


The most popular advice about how to reconstitute peptides is also the most incomplete: add water, swirl gently, and refrigerate the vial. That process may produce a clear solution, but clarity alone doesn't prove that the peptide will remain chemically suitable for your research.
Reconstitution changes the peptide from a dry, highly stable material into a solution with a different storage profile. The solvent, concentration, temperature history, vial access, and freeze-thaw pattern all matter. This guide focuses on the part many protocols overlook, what happens after the powder disappears.
Lyophilized peptides are comparatively stable because removing water limits many degradation pathways. Once you add solvent, the peptide enters a more vulnerable state. A peer-reviewed peptide standards paper explains that re-solubilized calibrator solutions are best stored frozen at or below −70 °C, while practical stability targets include at least 30 days at 4 °C and 3 years at −20 °C for peptides supplied in solution or as lyophilized material (peer-reviewed peptide standards paper).
That distinction changes the way I plan a preparation. I don't automatically reconstitute an entire vial for convenience. I prepare the quantity needed for near-term work, then aliquot and freeze the remainder when the experimental design allows it. Smaller aliquots reduce repeated access and limit the number of freeze-thaw events imposed on the same solution.
Sterile technique remains essential, but it doesn't answer the stability question. A vial can be prepared with clean tools, added slowly along the wall, and gently swirled, then lose performance through unsuitable storage or repeated handling.
Freeze-thaw cycling can drive pH shifts and aggregation. Aggregation may also escape a standard purity assessment, so a sample can appear acceptable by one analytical method while its functional behavior has changed. Recent formulation commentary highlights this gap and notes that the usage pattern after reconstitution may present a greater risk than the initial mixing step (peptide stability in use commentary).
Practical rule: Treat reconstitution as the beginning of a stability program, not the end of a preparation task.
Peptides don't all respond to solvent and temperature in the same way. Hydrophobic sequences, aggregation-prone materials, and cysteine-containing peptides require more careful handling because aggregation or disulfide-related instability can become a problem when the solution experiences rough agitation or temperature abuse.
The useful question isn't “Did it dissolve?” Ask instead:
Those decisions protect analytical accuracy more effectively than a rushed mixing routine.
Preparation begins before the vial is opened. Let the lyophilized peptide vial reach room temperature for about 10–15 minutes before adding solvent, as described in a practical reconstitution guide (peptide reconstitution preparation guide). This reduces the chance of condensation forming when a cold vial meets warmer room air.
Clean the work surface and allow it to dry. Wash your hands thoroughly, put on suitable protective equipment, and arrange every item before drawing solvent. Rushing creates avoidable interruptions, and interruptions are when people forget to swab a stopper, use the wrong vial, or reach for a previously used syringe.
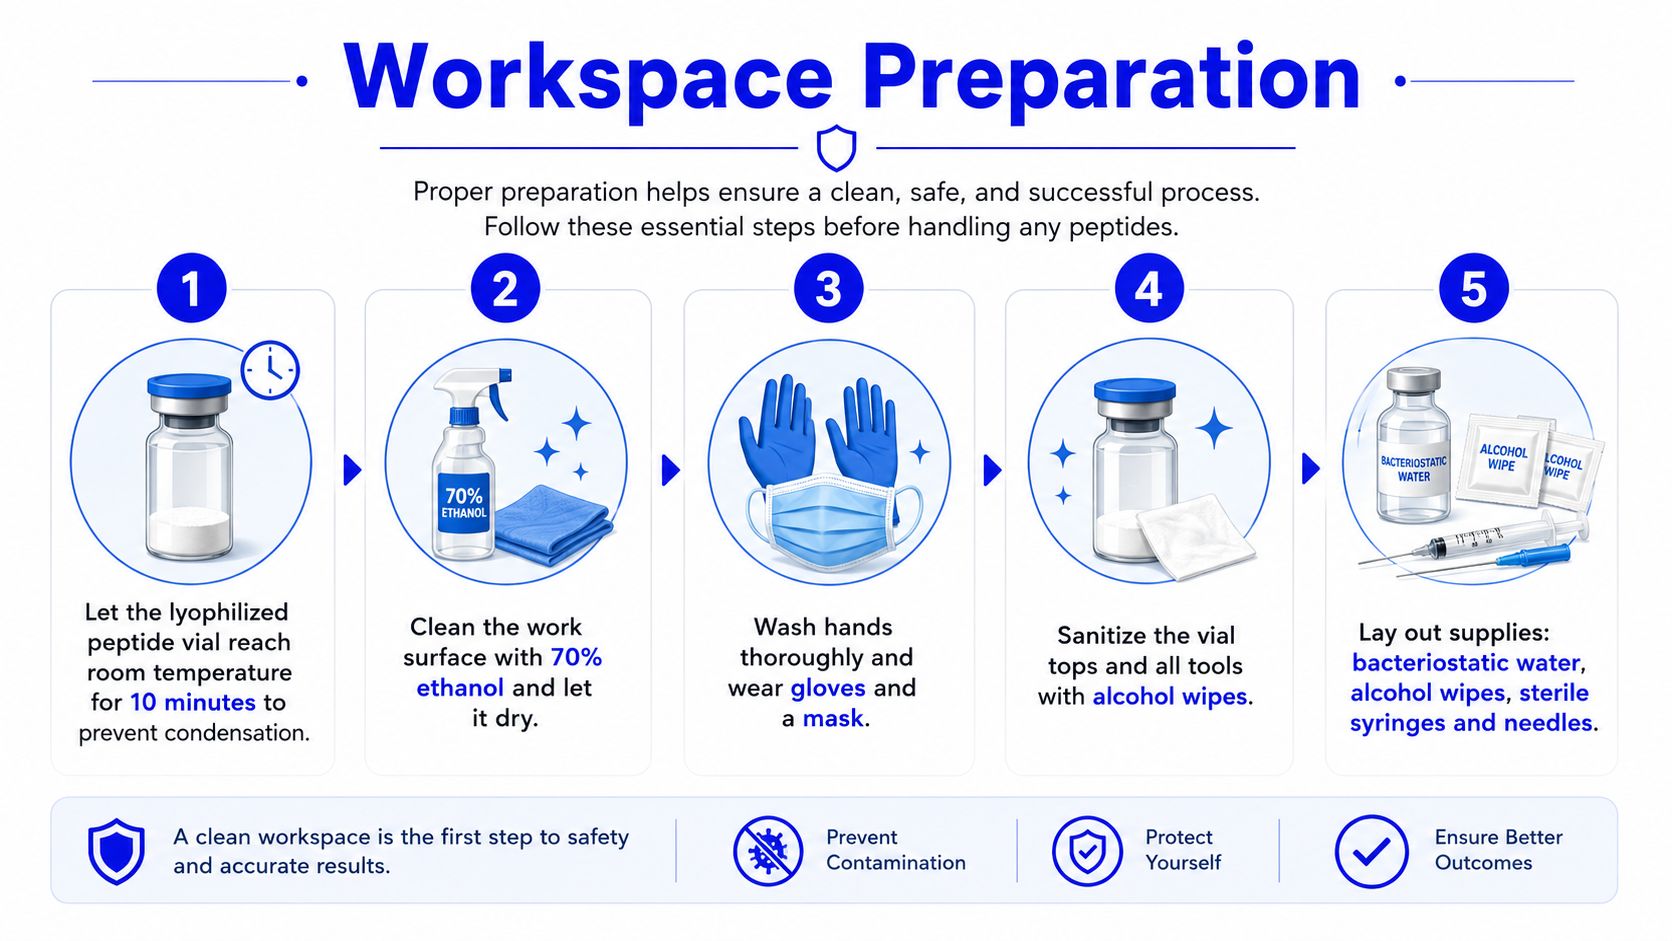
A general laboratory equipment reference, such as the Material Handling USA lab checklist, can help new laboratories identify missing supplies before a preparation session. The important point is organization. You should be able to reach the solvent, sterile syringe, wipes, gloves, labels, and waste container without leaving the clean work area.
Don't place open vials beside unnecessary equipment. Minimize movement, keep caps and sterile components protected, and avoid touching the needle or syringe connection. Sterile technique isn't a single action. It's a series of small decisions that prevent contamination from entering the solution.
Water is a reasonable starting point, not a universal answer. Many peptides dissolve in water, PBS, or saline. Poorly soluble sequences may need a stronger solvent, such as acetonitrile, DMSO, or DMF, followed by gradual transfer into a compatible buffer, as described in this peptide reconstitution solvent guidance.
Solvent selection also determines what happens after the powder disappears. A solvent that dissolves the material efficiently can still alter pH, interfere with an assay, or cause precipitation during dilution. The planned storage window matters because a clear solution is not automatically a stable one.
| Solvent | Best For | Storage Window | Notes |
|---|---|---|---|
| Bacteriostatic water | Multi-dose handling when the reconstituted vial will be refrigerated | Days to weeks, depending on sequence and formulation | Contains 0.9% benzyl alcohol. Confirm preservative compatibility before use. |
| Preservative-free sterile water | Single-use preparations or situations where benzyl alcohol is incompatible | Typically much shorter after reconstitution | Do not treat it as a multi-dose solution without validated stability information. |
| PBS or another buffered diluent | Peptides and assays requiring controlled pH or ionic conditions | Depends on sequence, buffer, concentration, and storage | Evaluate buffer compatibility rather than assuming it. |
| Dilute acetic acid | Hydrophobic or aggregation-prone peptides that resist neutral-pH water | Depends on later dilution, formulation, and storage | Dilute acetic acid can solubilize the material before adjustment to target concentration with a compatible diluent. |
For difficult sequences, start with a small aliquot of dilute acetic acid, commonly about 0.1% to 0.6%, then add bacteriostatic water when appropriate. The acid is a problem-solving tool, not a default additive. This approach is relevant when the peptide remains cloudy, forms visible particles, or precipitates after dilution. The acetic acid and bacteriostatic water guidance provides additional solvent considerations.
Bacteriostatic water contains 0.9% benzyl alcohol and may suit a refrigerated vial that will be entered more than once. Preservative-free sterile water is generally better suited to single-use preparation when benzyl alcohol could affect the work. Neither option supplies sequence-specific stability data. Monitor the solution after reconstitution, especially during the first part of the planned storage window, and confirm that appearance and assay performance remain acceptable.
Before selecting a diluent, answer three questions:
If repeated access is uncertain, prepare aliquots rather than assuming the solution will tolerate multiple entries. The solvent, final concentration, container, temperature, and access pattern all affect how long the preparation remains usable.
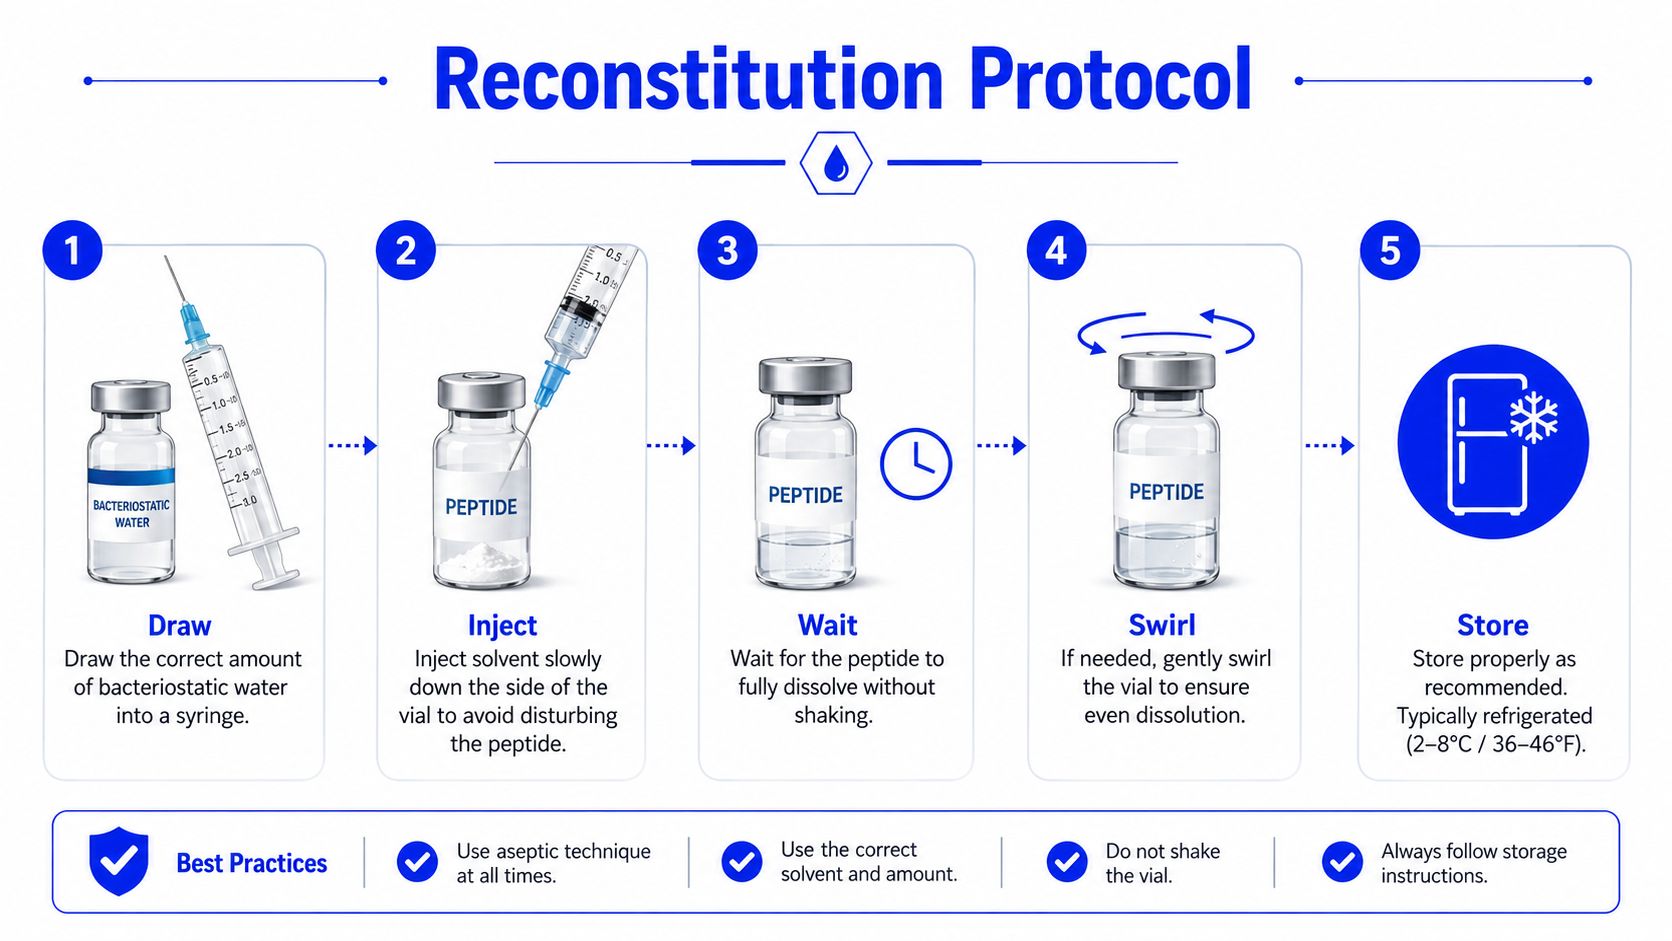
The powder dissolving is only the midpoint. Technique during mixing influences foaming, aggregation, and the stability window that follows, so work slowly and keep the vial upright whenever practical. Never shake to force dissolution.
Bring the vial to room temperature. Let the sealed dry peptide vial stand for about 10–15 minutes before preparation.
Sanitize the stoppers. Wipe both vial stoppers with alcohol and let them dry. Draw the selected solvent with a new sterile syringe and needle.
Inject along the wall. Insert the needle carefully and release the solvent slowly down the vial's inside wall. Avoid directing a high-pressure stream at the powder, which can increase foaming and mechanical stress.
Let the vial rest. Leave it undisturbed for roughly 60–90 seconds after adding the solvent. Difficult sequences or higher concentrations may need 15–30 minutes for complete dissolution, depending on the material and formulation. The practical peptide reconstitution workflow describes the same controlled approach.
Swirl gently if needed. Roll or gently swirl the vial rather than shaking, vortexing, or tapping it repeatedly. If an acidic co-solvent is required, dissolve the material gradually before bringing it to final volume with the compatible diluent.
Inspect the solution. Check for persistent cloudiness, visible particles, precipitate, or an unexpected color change. Continued agitation will not correct an incompatible formulation or degraded material.
Label and store. Record the peptide identity, solvent, concentration, preparation date, and storage condition immediately. The post-reconstitution window depends on the sequence, solvent, concentration, temperature, and number of vial entries.
The laboratory reconstitution protocol also connects solvent selection and concentration planning with the intended use window. A clear solution confirms appearance only. It does not establish chemical stability or assay performance.
Use the following demonstration as a visual supplement to the handling sequence. It does not replace your laboratory's validated method or the supplier's documentation.
The highest-risk period often begins after the powder has dissolved. Dry lyophilized peptides are commonly stored at −20°C for long-term storage, while 4°C suits shorter holding periods. After reconstitution, refrigeration is typical, but the usable window depends on the sequence, solvent, concentration, temperature, and handling frequency (peptide storage and reconstitution overview).
Do not treat a clear solution as proof of stability. It confirms appearance only. Chemical degradation, adsorption, or loss of assay performance can occur without visible change. The post-reconstitution window must therefore match the peptide's formulation and intended use, not a generic rule.
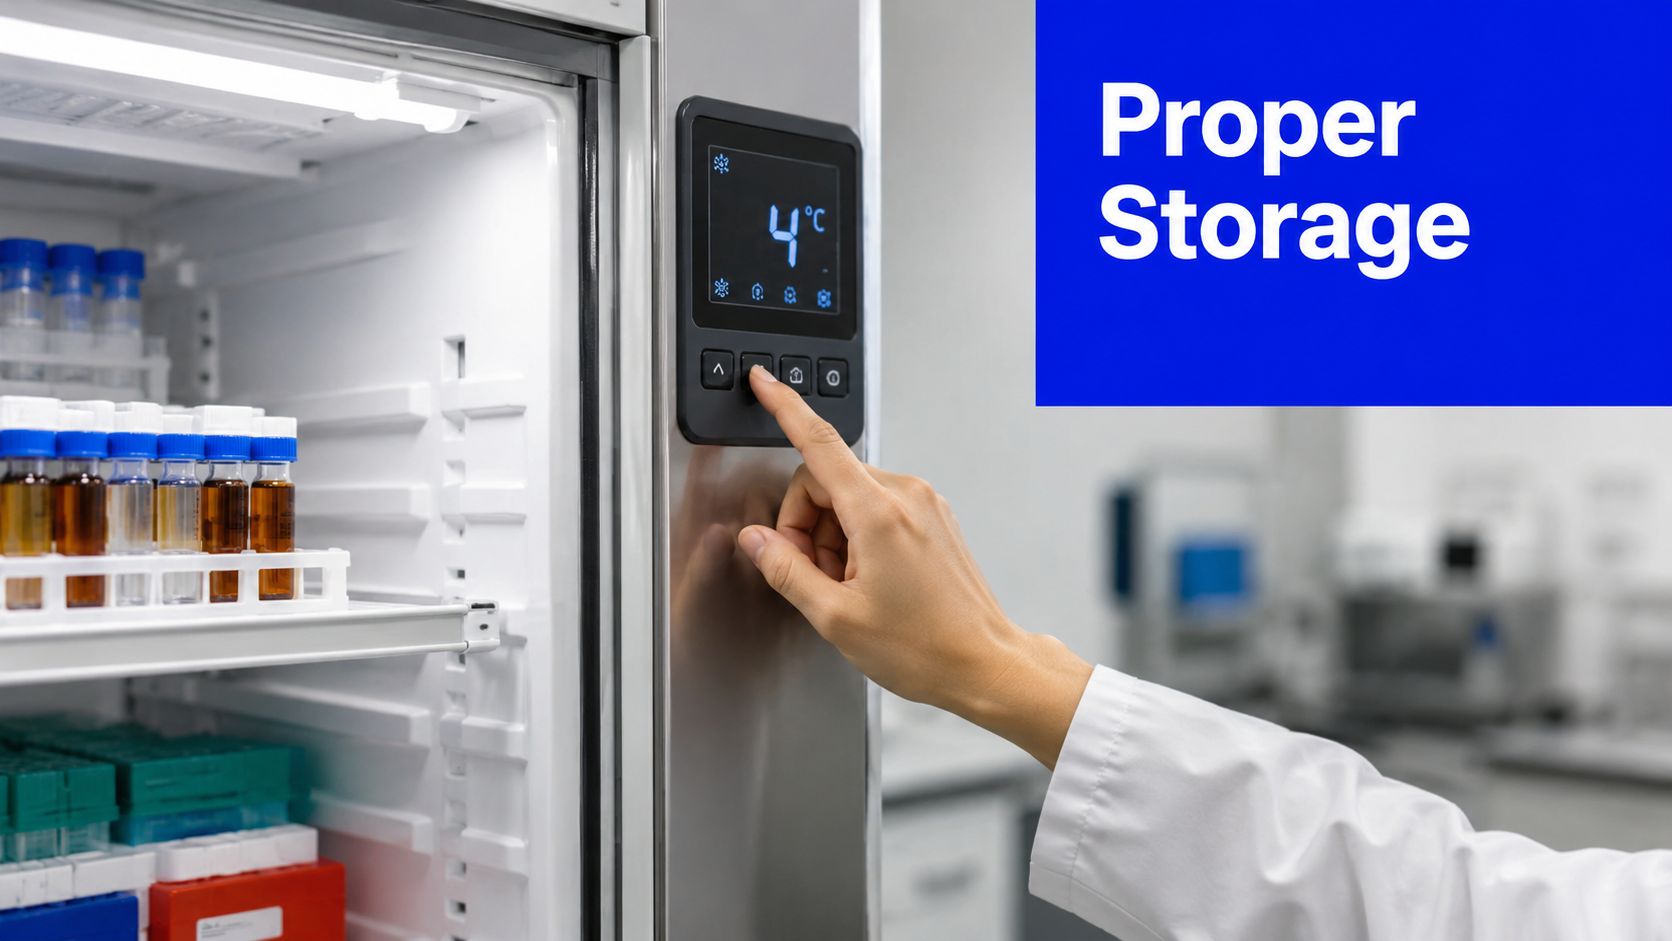
Repeated warming, refrigeration, and vial access place more stress on a solution than one controlled preparation. Freeze-thaw cycling can promote pH shifts and aggregation, and a basic purity check may miss those changes. Store the material at the temperature specified for the formulation, and avoid returning repeatedly used aliquots to the reserve stock.
Cysteine-containing peptides require closer monitoring because unsuitable conditions can increase disulfide-related instability and aggregation. Hydrophobic sequences may precipitate after dilution or cooling, so solvent choice and final concentration remain relevant after dissolution. If the selected solvent produces a stable stock but performs poorly after dilution, prepare only the amount needed for the working period and verify compatibility before scaling up.
Aliquoting separates the working supply from the reserve. Use low-binding containers suited to the peptide, then label each aliquot with identity, concentration, solvent, preparation date, and storage condition. Keep thaw cycles and unnecessary vial entries as low as the workflow allows.
Quarantine or discard material showing persistent cloudiness, particles, precipitate, unexpected color change, or unexplained assay behavior. Appearance alone cannot establish integrity. For material important to the study, confirm performance with the appropriate analytical method rather than extending the storage window by assumption.
Set the concentration from the assay requirement, molecular mass, and peptide behavior, rather than defaulting to a familiar solvent volume. The basic relationship is:
Concentration = peptide amount ÷ solvent volume
For analytical peptide calibrators, a re-solubilized range of 0.5–2 nmol/μL is reported in the relevant standards literature. Use that range as a reference point, then confirm the target against the method and peptide-specific validation.
Start with the working concentration required by the assay and calculate the solvent volume needed to make it. Before preparing the full stock, check whether the resulting volume can be pipetted accurately, remains compatible with the selected diluent, and is likely to stay dissolved during the planned stability window.
A smaller solvent volume produces a more concentrated stock and limits the volume placed into storage. It can also make incomplete dissolution or aggregation more likely with a difficult sequence. A larger volume may improve low-level transfer accuracy, while increasing the solution volume that must be stored and handled.
For an easily dissolved peptide in PBS, 1 mg/mL can serve as a practical working-stock example. It is a planning reference, not a universal target. The suitable concentration depends on solubility, assay sensitivity, container losses, and how long the stock will remain in use.
A calculator prevents arithmetic mistakes, but it cannot determine chemical compatibility or predict stability after dilution. Use it to plan volume, then judge whether the solvent and concentration fit the peptide, storage pattern, and post-reconstitution use window.
Peptide Warehouse USA offers research peptides and related compounds with batch documentation, including Certificates of Analysis and supporting microbial and endotoxin reports. Its reconstitution resources can support solvent-volume and concentration planning. Visit Peptide Warehouse USA to review research-use options and align procurement with a controlled preparation and storage workflow.
Leave a comment