No products in the cart.


You've got the vial on the bench, the target dose circled in your notebook, and a syringe already in hand. That's usually the moment a peptide dilution calculator stops feeling like a convenience and starts feeling necessary, because the math looks simple until mg, mcg, mL, and syringe units all show up at once.
The core challenge isn't just arithmetic. It's knowing whether you're doing the first mix from powder or a second dilution from an already prepared solution, then checking whether the result is easy to measure on the syringe you're holding. A good calculator helps with both, but it can't decide the bench-side trade-off for you.
A first-time researcher usually reaches for a peptide dilution calculator at the exact moment the units start to shift. The vial size is in mg, the target dose is written in mcg, the reconstitution volume is in mL, and the syringe is labeled in units. Each number is easy on its own, but the handoff between them is where people get stuck.
The deeper issue is that many calculator pages only solve one kind of problem. They show how to turn a vial and a water volume into a stock concentration, then stop there, even though researchers often need help with a second job, adjusting an already mixed solution for aliquots, storage, or assay prep. That gap is exactly why the phrase “dilution” causes confusion in real workflows. A page that treats powder reconstitution and secondary dilution as the same thing leaves the user to guess which concentration is being calculated.
Practical rule: if you can't say whether you're starting from powder or from a stock solution, you're not ready to calculate yet.
The math itself is not the hard part. The hard part is deciding what the calculator should return, the initial stock concentration, the draw volume for one dose, or a second dilution for a smaller working solution.
A bench-savvy workflow asks three questions before anything else:
That framing matters because the calculator is only as useful as the input you give it. For researchers and lab buyers, especially those comparing peptide strengths or custom aliquots, the value is precision, not just a quick conversion.
A peptide dilution calculator separates two jobs that are often blurred together on generic calculator pages. One job is reconstitution, where lyophilized powder is dissolved and the stock concentration is set. The other is secondary dilution, where an existing stock is diluted again to reach a working concentration for a specific use.
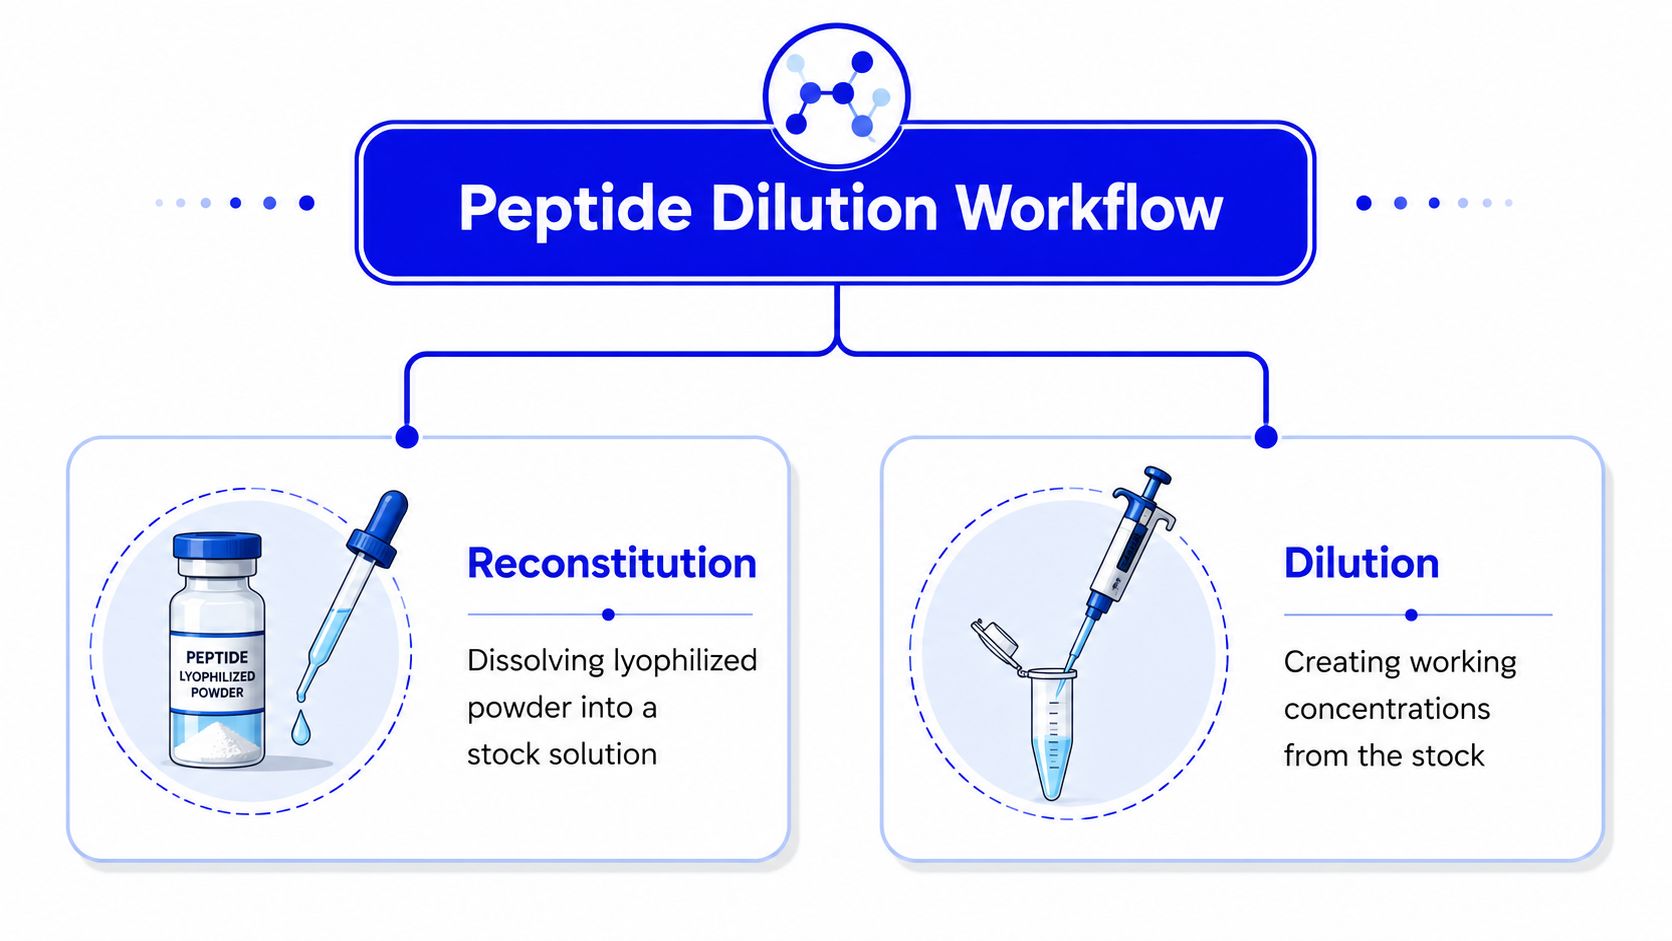
Reconstitution fixes the starting point. If you add a measured volume of diluent to powder, you are deciding how concentrated the stock will be. Secondary dilution starts after that, once the stock already exists and you want a lower or different working concentration for a specific task.
That distinction matters because the same word, “dilution,” can hide two different math problems. If someone treats a stock solution like powder, or uses the wrong starting concentration for a new draw volume, the result can still look neat on paper while being wrong at the bench.
A calculator should ask for different inputs depending on the job:
The practical reason is simple. Reconstitution tells you how much peptide is in the vial, while secondary dilution tells you how easy the solution is to measure or pipette after that first step. If a page does not separate those two tasks, it pushes the user toward the wrong formula for the wrong starting material.
The same caution shows up in other concentration tools too, such as the science calculator by thecalcs. It is not peptide-specific, but it reflects the same rule, concentration changes with volume, and the starting material determines which calculation makes sense.
The core math is simple once you keep the order straight. First, calculate concentration. Then calculate the draw volume for the target dose. After that, if needed, convert that draw into syringe units.
That order keeps the logic clean. You can't convert to syringe units until you know the volume you need, and you can't know the volume until you know the concentration.
| Step | Formula | Worked Input | Result |
|---|---|---|---|
| Concentration | Peptide amount ÷ diluent volume | 1,000 mcg ÷ 2 mL | 500 mcg/mL |
| Draw volume | Desired dose ÷ concentration | 250 mcg ÷ 500 mcg/mL | 0.5 mL |
| Syringe units | Draw volume × calibration | 0.5 mL × U-100 scale | 50 units |
If 1,000 mcg of peptide is dissolved in 2 mL of bacteriostatic water, the concentration is 500 mcg/mL. That part is just dividing the amount by the volume. The formula is the same one you'll see in many dilution tools, and the example above shows why the numbers matter in context, not just on paper.
Now take a 250 mcg target dose. Using the formula Required volume = Desired dose ÷ Concentration, the draw volume is 0.5 mL. That's a draw you can picture on the syringe, which is the point of doing the math carefully before you touch the vial again.
The same logic works with larger stock vials. A 10 mg vial reconstituted in 1 mL is a more concentrated starting point, so the draw volume for any target dose shrinks accordingly. The arithmetic doesn't change, only the concentration does.
Keep one sanity check in mind, if the target dose gets smaller, the draw volume should also get smaller. If it doesn't, one of your units is wrong.
Before you trust the result, ask whether the answer makes sense in plain language. If a tiny dose is producing a huge draw, the solution is probably too dilute for that target. If the draw is so tiny you can barely read it, the solution may be too concentrated for comfortable measurement.
Once you know the draw volume, the next step is translating it into the marks on the syringe. That's where U-100 and U-40 calibration matter, because the same liquid volume lands on different unit scales depending on the syringe type.
A U-100 syringe is calibrated at 100 units per mL, while a U-40 syringe is calibrated at 40 units per mL. The conversion rule is straightforward, multiply the draw volume by the syringe calibration.
The source workflow described in the brief also notes the same chain in formula form, concentration is peptide amount divided by diluent volume, volume to draw is target dose divided by concentration, and syringe units are draw volume multiplied by the syringe calibration, with 100 for a U-100 syringe and 40 for a U-40 syringe. Another source expresses the same idea as mg per syringe unit = concentration ÷ 100, which is why the unit readout lines up so cleanly on insulin syringes. Clinical Tools Library's peptide dosage calculator shows that same logic in a syringe-based format.
The important bench lesson is that a result can be arithmetically correct and still be hard to measure. Very low draw volumes are difficult to read accurately on common insulin syringes, which is why some guides recommend using a larger reconstitution volume when the target dose is tiny. The trade-off is real, more dilute can improve readability, but it also increases handling steps and can make the workflow less convenient.
A practical example from the sources shows how concentration and syringe readout work together. If 1,000 mcg is dissolved in 2 mL, the concentration is 500 mcg/mL, and a 250 mcg target dose corresponds to a 0.5 mL draw. On a U-100 syringe, that's 50 units, a much easier reading than a sub-unit draw.
A lower concentration does not automatically make dosing safer. It can make the line easier to read, but it also means you're moving more liquid and handling more volume. A higher concentration does the opposite, less liquid to move, but more risk of ending up in a range that's hard to measure cleanly on the syringe.
A reconstitution volume should match the way you will read the dose at the bench. If the liquid is so concentrated that the draw barely moves the plunger, the syringe becomes the weak link. If the liquid is so dilute that every draw requires a large volume, the prep becomes harder to handle and easier to disturb.
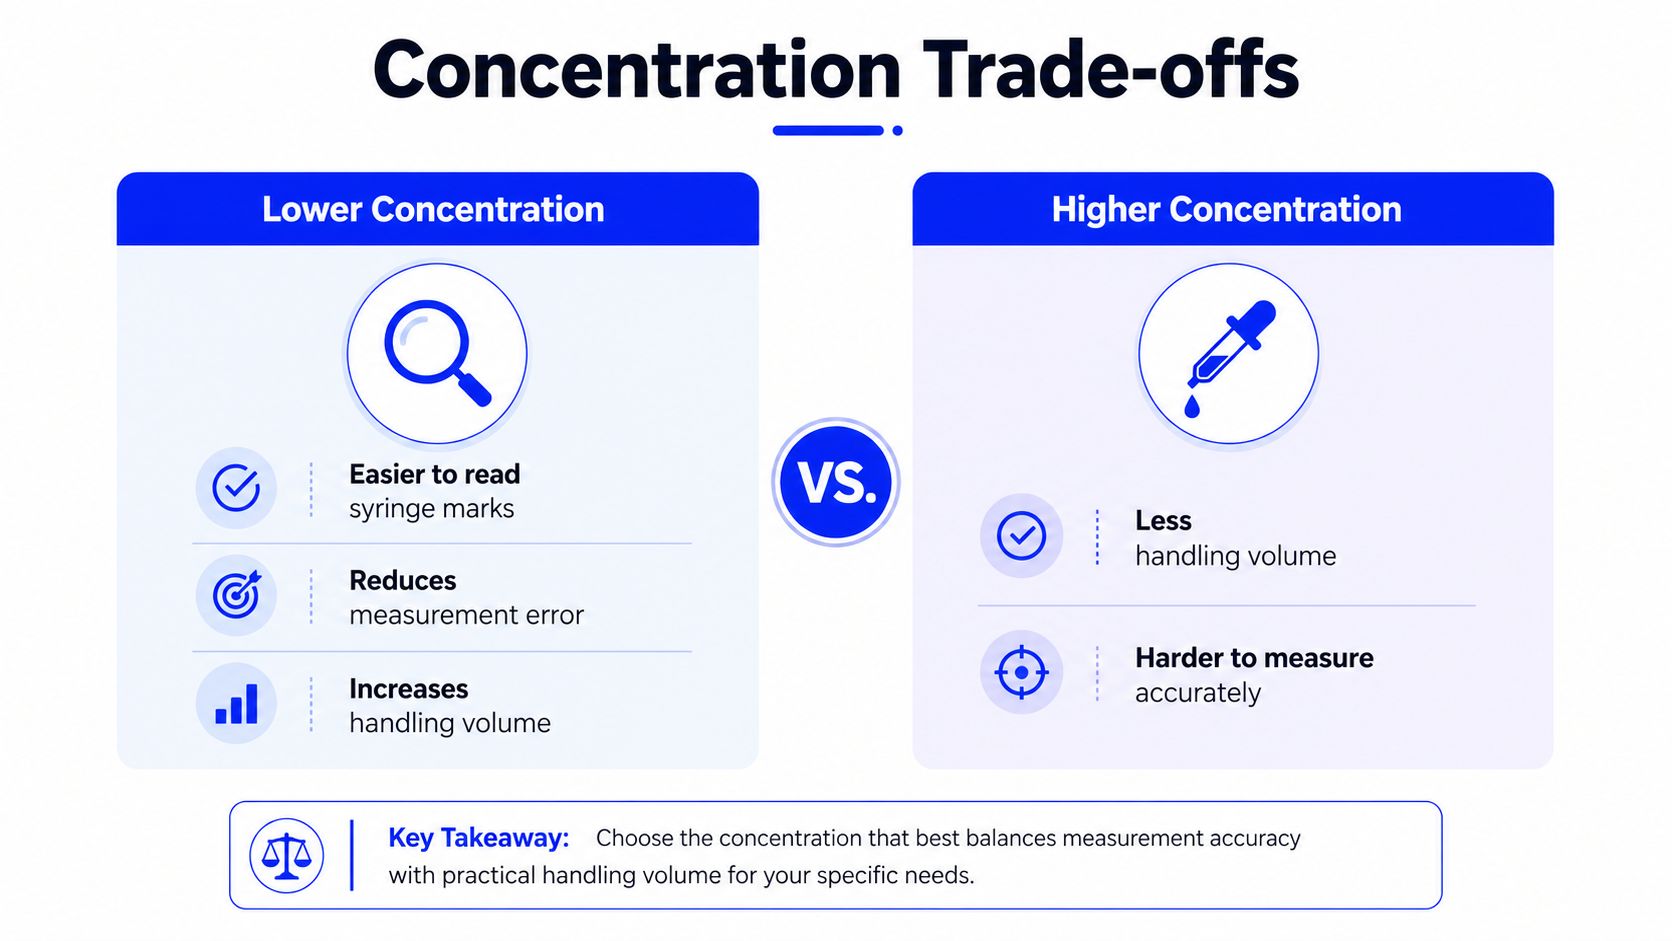
A calculator can give a correct concentration, but that number still has to fit the tool in your hand. A draw that lands in a readable part of the syringe scale is easier to verify than a tiny volume that sits between marks. That is the part many arithmetic pages miss, because the math may be clean while the measurement is still awkward.
The reverse problem matters too. A larger draw may be easier to see, but it can also mean more transfers, more chance of knocking the vial, and more time spent handling the solution. Reconstitution volume is not just about getting to the right concentration, it is about choosing a volume that gives you a dose you can measure without second-guessing the line on the barrel.
Bottom line: the calculator gives you the concentration, but the bench decision is whether that concentration can be read with confidence on your actual syringe or pipette.
The useful question is not, “What concentration looks best on paper?” It is, “What reconstitution volume gives me a draw that I can measure the same way each time without squinting at the syringe?”
Work backward from the measurement step. Start with the dose you want, then look at the syringe or pipette you will use, and ask whether the final draw will land in a range that is easy to read, easy to repeat, and not so small that a tiny visual error changes the result. If the answer is no, adjust the reconstitution volume before you mix the vial.
A quick reality check helps here. The right volume is often the one that keeps the dose visible, keeps the workflow manageable, and keeps you from forcing a precise dose into a scale that was never meant to show it clearly.
Good peptide math doesn't protect a bad prep. Once you've calculated the numbers, the next risk is in how the solution is made, handled, and stored. Sterility and solubility are separate from the calculation, but they decide whether the calculated result is usable.
For multi-dose work, bacteriostatic water is commonly used because it contains a preservative. For single-use preparations, sterile water is the cleaner fit. The key is to match the diluent to the way the solution will be used, not to treat every prep the same way.
Gentle mixing matters too. Peptides should be allowed to dissolve with care rather than force, since rough handling can make the solution harder to inspect. Storage should follow the peptide's own stability profile, because the clock starts once the material is reconstituted.
A calculator cannot protect you from a unit slip or a bad starting assumption. These are the errors that usually matter most:
Those are the kinds of errors that produce the wrong answer even when the arithmetic appears correct.
Bench habit: write the starting unit, the target unit, and the final unit next to each other before you calculate anything.
That habit is small, but it prevents the kind of confusion that ruins a prep long before the peptide ever reaches the assay or syringe.
What's the difference between reconstitution and secondary dilution? Reconstitution starts with powder and creates the stock solution. Secondary dilution starts with a liquid stock and makes it weaker for a specific working use.
What if the calculator gives me a draw smaller than one syringe unit? That usually means the solution is too concentrated for easy reading on that syringe. In that case, choose a larger reconstitution volume and recalculate the concentration.
Can a peptide dilution calculator replace hand calculations? It can replace repetitive arithmetic, but not your audit trail. Good lab practice still means checking units, verifying the starting material, and keeping the calculation logic visible.
How do I sanity-check a result without a third-party tool? Start with the formula chain, concentration first, then draw volume, then syringe units. If the dose gets smaller, the draw should shrink, and if it doesn't, one of the inputs is wrong.
Researchers who buy for ongoing lab work also tend to look for clean sourcing, batch documentation, and transparent handling of research-grade materials. That matters because concentration math only helps if the starting material itself is consistent.
If you're sourcing research-grade peptides for routine lab work, explore the catalog at Peptide Warehouse USA and review options with the same concentration discipline you'd use at the bench. Their research-only supply model fits the exact kind of work covered here, where purity, consistency, and clear documentation matter as much as the math.